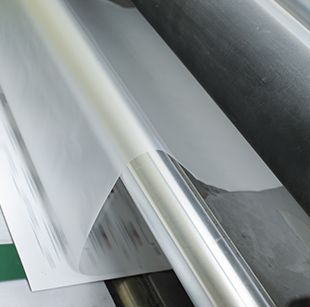
Best Practices for Applying Cold Lamination Film
In the ever-evolving landscape of document protection and graphic enhancement, cold lamination has emerged as a versatile and efficient solution. Whether you are safeguarding important documents or enhancing the vibrancy of graphics, applying cold lamination film requires finesse and attention to detail. In this comprehensive guide, we unveil the best practices that will elevate your cold lamination process, ensuring a flawless finish that stands the test of time.
Before we dive into the best practices, let's establish a foundational understanding of cold lamination. Unlike its hot counterpart, cold lamination utilizes pressure-sensitive adhesives to bond the film to the surface. This makes it an ideal choice for heat-sensitive materials, such as documents and graphics produced with inkjet printers.
Selecting the Right Cold Lamination Film
The success of your lamination project hinges on choosing the right film. Consider the following factors:
1. Film Thickness
Choose a film thickness that aligns with the level of protection required. Thicker films provide more robust protection but may be less flexible.
2. Finish Type
Cold lamination films are available in various finishes, including matte and gloss. Consider the desired aesthetic and functional outcome when selecting the finish.
3. Adhesive Quality
Ensure the adhesive quality of the film is compatible with the surface of your documents or graphics. High-quality adhesives prevent bubbling and ensure a smooth finish.
Best Practices for Applying Cold Lamination Film
1. Prepare the Surface
Before applying the lamination film, ensure that the surface is clean and free from dust, dirt, or moisture. Any contaminants on the surface can compromise the adhesion and longevity of the lamination.
2. Trim Excess Material
Trim any excess material from the document or graphic before applying the film. This not only ensures a neat and professional appearance but also prevents the edges from lifting over time.
3. Use a Lamination Machine or Roller
For large-scale projects, investing in a quality lamination machine or roller is advisable. This ensures even pressure and adhesion, resulting in a uniform and professional finish.
4. Apply Even Pressure
If using a roller, apply consistent and even pressure throughout the lamination process. Uneven pressure can lead to wrinkles, bubbles, or an uneven finish.
5. Work in Sections
For larger documents or graphics, work in manageable sections. This allows for better control and ensures that each part receives the attention needed for a perfect lamination.
6. Smooth Out Bubbles Immediately
If bubbles appear during the lamination process, address them promptly. Use a smooth, flat tool to press out any trapped air, starting from the center and moving towards the edges.
7. Allow for Proper Drying Time
After lamination, allow the document or graphic to dry completely before handling or cutting. Rushing this step may result in smudges or imperfections.
Benefits of Cold Lamination
1. Preservation of Colors
Cold lamination preserves the vibrancy of colors in printed documents or graphics, making it an excellent choice for projects that require visual impact.
2. Versatility in Materials
Cold lamination is compatible with a wide range of materials, including paper, cardstock, and inkjet prints. This versatility makes it a go-to solution for various applications.
3. No Heat Damage
Since cold lamination doesn't involve heat, it's the perfect choice for heat-sensitive materials. This ensures that delicate inks or paper won't be damaged during the lamination process.
Conclusion
Mastering the art of applying cold lamination film to documents and graphics is a skill that combines precision, quality materials, and attention to detail. By adhering to these best practices, you ensure not only a visually appealing result but also the longevity and protection of your valuable documents and graphics.

评论
发表评论